 TESKIS
How to sharpen and care for pruning shears
A practical guide to sharpening secateurs: bevel angles, grits, stroke counts, bypass versus anvil, plus cleaning sap and rust, disinfecting and winter storage.
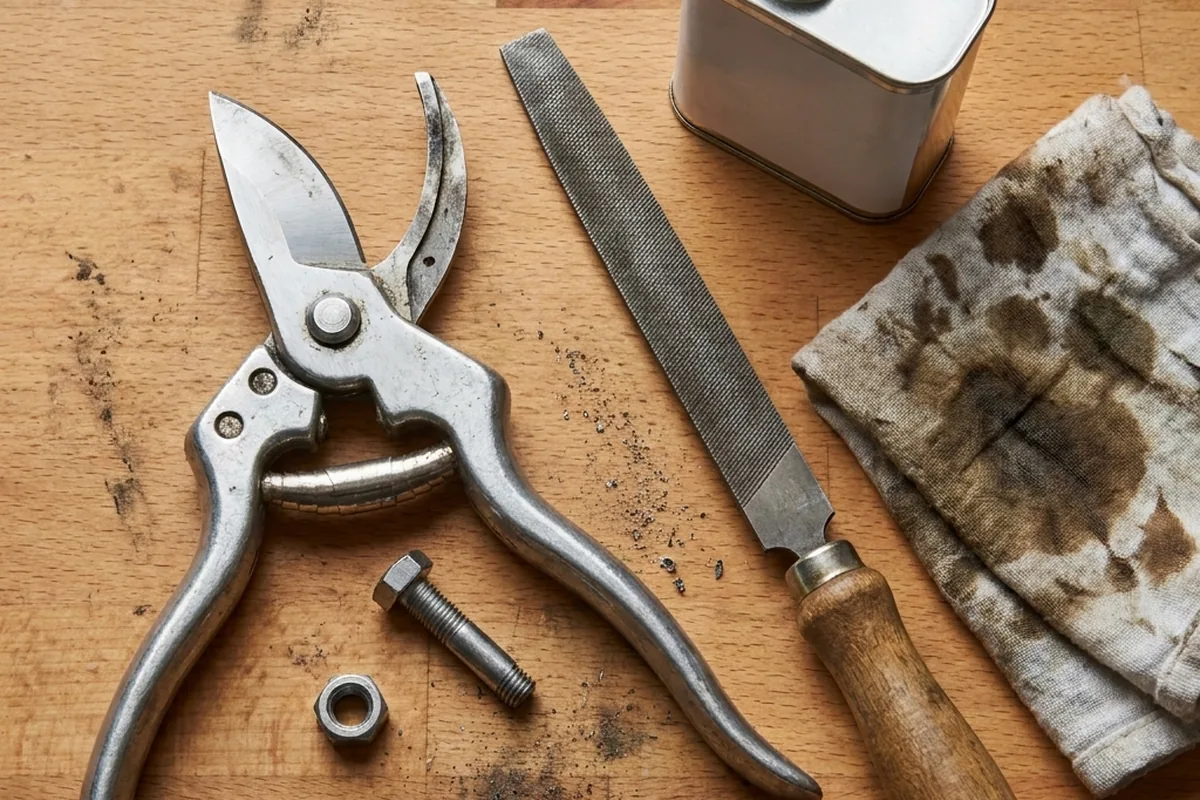
Blunt secateurs make more work for you and more trouble for the plant. Sharpening a pair takes about ten minutes, needs one file, and is the single piece of maintenance that changes how a tool feels in the hand. Here is how to tell when it is due, how the job differs between bypass and anvil pruners, and what else the tool needs across the year.
A clean cut heals. A crushed one invites disease.
A plant seals a pruning wound by growing callus tissue out from the cambium at the cut edge. That process needs a flat, undamaged edge to work from. A sharp blade slices the stem in one pass and leaves a glossy face with the bark still bonded to the wood. A blunt blade compresses the stem before it severs it, so the cut face is ragged, the bark is torn back, and a band of cells either side of the wound is dead rather than merely cut.
That dead, damp tissue is where the problems start. Coral spot moves into torn cuts on acers and magnolias. Bacterial canker enters plums and cherries through wounds that stay open. Ragged cuts on apples give apple canker somewhere to sit through a wet autumn. None of this is dramatic, and none of it happens every time, but the odds shift with the edge.
The gardener pays too. A dull pair takes two to three times the grip force for the same stem. That is the point where people start using two hands, or pushing their thumb against the back of the blade, and where an afternoon of hedge work becomes a sore hand for two days.
How to tell when they need sharpening
- The paper test. Hold a sheet of ordinary 80gsm printer paper by one corner and close the shears slowly through it. A sharp pair slices from pivot to tip without the paper moving. A blunt pair folds it, drags, or tears.
- The stem test. Cut a pencil-thick living stem — willow or dogwood is ideal. The cut face should be flat and glossy. Ridges, a tag of bark hanging off, or a flattened oval stem all mean the edge has gone.
- The light test. A genuinely sharp edge has no width, so it reflects nothing. Tilt the blade under a lamp: a bright line running along the cutting edge is a flat spot you can see.
- Effort and sound. Sharp shears cut with one short snick. If you are hearing a crunch, or squeezing twice, stop and file.
As a schedule: a touch-up of eight to twelve strokes after every three or four hours of cutting, and a full sharpen two or three times across the season. Dead and dry wood dulls an edge far faster than soft green growth, so a day taking out deadwood counts for more than a day deadheading.
Bypass and anvil are not sharpened the same way
Bypass pruners work like scissors: a curved cutting blade passes a flat hooked counter-blade. Only the cutting blade is sharpened, and only on its outer face, which carries a single bevel ground at roughly 20 to 23 degrees. The inner face — the one that slides against the hook — is flat or very slightly hollow and must stay that way. Put a bevel on the inner face and the two blades no longer meet along their length, which is the most common way a good pair of secateurs is ruined.
Anvil pruners close a single blade onto a flat bar of softer metal. That blade normally carries a bevel on both sides, each around 25 to 30 degrees, and the edge has to stay centred so it lands in the middle of the anvil. So you work both faces with the same number of strokes. Keep the anvil bar itself clean too: a ridge of dried sap on it will hold the blade off the stem and crush what it should cut. Anvil pruners are for dead wood; use bypass on anything living.
What the job needs
- A 600-grit diamond file or plate for the working edge; 300 to 400 grit for nicks and neglected blades.
- A 1000-grit whetstone if you want a finer finish. Optional — 600 grit cuts green wood perfectly well.
- A rag and white spirit or isopropyl alcohol for sap.
- 0000 steel wool for rust.
- Light machine oil (3-in-1) or camellia oil.
- A screwdriver or small spanner for the pivot.
Pull-through carbide sharpeners are quick and useful in a pocket, but they remove a lot of metal and leave a coarse edge. Treat them as a field fix, not a method.
Sharpening, step by step
- Clean first. Two minutes with white spirit on a rag. Filing through a layer of dried sap just clogs the file.
- Set up. Open the shears fully and rest them on a bench with the cutting blade facing up and the edge pointing away from you.
- Find the existing bevel. Lay the file flat on the bevel and rock it gently until it sits flush. You will feel it stop rocking and hear the note change. That is the factory angle. Follow it rather than inventing your own; on a 25 mm file, the spine will be sitting roughly 3–4 mm off the blade face.
- Stroke. Push the file away from you, edge-leading, in one continuous sweep from pivot to tip, following the curve of the blade. Light pressure — the diamond does the cutting, you only steer. Lift the file on the return. Do not saw back and forth.
- Count. Eight to twelve strokes for a routine touch-up. For a nicked or long-neglected blade, start at 400 grit for fifteen to twenty strokes until the damage is gone, then twenty more at 600. Stop when the bright line along the edge has disappeared.
- Feel for the burr. Run a thumb across the flat inner face near the edge, never along it. A fine wire burr means you have sharpened all the way through.
- Remove the burr. Lay the file dead flat on the inner face — no angle at all — and take one or two very light passes. A leather offcut or the edge of a cardboard box works just as well: ten light strops.
- Test and oil. Paper first, then a green stem. Wipe off the filings, put one drop of oil on the blade and one on the pivot, and work the handles ten times.
On an anvil pruner, repeat steps 3 to 7 on the second face with the same stroke count, then close the shears and check the edge is landing on the centre of the anvil. Ten minutes for a routine sharpen; twenty to twenty-five for a rescue.
Sap, rust and disinfection
Sap comes off with white spirit or isopropyl on a rag at the end of each session, while it is still soft. Conifer resin is more stubborn: wrap a soaked rag around the closed blades for five minutes and it will wipe away. Never scrape an edge with a knife.
Light rust takes 0000 steel wool with a few drops of oil and about thirty seconds of rubbing. For heavier rust, dissolve a tablespoon of citric acid in 500 ml of warm water, submerge the blade for 30 to 60 minutes, scrub, rinse, then dry hard and oil immediately — bare steel will flash-rust within minutes of coming out.
Disinfecting matters between diseased plants, not between every cut on a healthy shrub. Wipe the blade with 70% isopropyl alcohol, leave it wet for thirty seconds, and let it evaporate; no rinse needed. Do this between every cut when removing fireblight, bacterial canker, box blight or rose black spot, and after pruning any plum or cherry. Avoid household bleach: it pits steel and corrodes springs. If it is all you have, dilute one part to nine, allow two minutes, then rinse, dry and oil.
Pivot, spring and replaceable parts
Closed, the blades should meet along their whole length with no daylight and no sideways wobble. If they part under load on a thick stem, tighten the pivot nut an eighth of a turn at a time, testing between each. Too tight and the tool will tire your hand and fail to spring open. Once a year, take the pivot apart, lay the pieces out left to right in the order they came off, clean the faces, add one drop of oil and reassemble.
Springs are consumables. Coil and wire springs fatigue after two to four hard seasons, and a spring that no longer throws the handles open is finished rather than dirty. Most pull out and clip back in by hand. A blade needs replacing when repeated sharpening has narrowed its profile, when a nick is deeper than about a millimetre, or when it has been bent by twisting through a stem that was too thick.
All of which is an argument for owning pruners whose parts you can actually buy. We stock one pair of bypass secateurs rather than a wall of them, and replaceable blade, spring and pivot bolt were part of why that pair was the one chosen.
Off-season storage
At the end of the season, clean, sharpen and oil the shears before they go away, not when they come back out. Wipe a film of camellia or light machine oil over the blade, the spring and the pivot, close and lock the handles, and store them somewhere genuinely dry. An indoor drawer or a sealed box with a silica sachet is better than a shelf in an unheated shed, where condensation cycles all winter. Do not leave them in a leather holster for months; the tannins in the leather encourage rust. Check them in February, before the first pruning of the year, rather than discovering the problem with a rose in one hand.
Maintenance at a glance
| Job | How often | What it takes |
|---|---|---|
| Wipe sap from the blade | After every session | Rag and white spirit, 1 minute |
| Touch-up sharpen | Every 3–4 hours of cutting | 600-grit diamond file, 8–12 strokes |
| Full sharpen | 2–3 times a season | 400 then 600 grit, 10 minutes |
| Disinfect | Between diseased plants | 70% isopropyl, 30 seconds wet |
| Oil the pivot | Monthly in season | One drop of light machine oil |
| Strip and clean the pivot | Once a year | Screwdriver, rag, oil, 15 minutes |
| Replace the spring | Every 2–4 seasons | Manufacturer’s spare, clips in by hand |
| Prepare for storage | End of season | Clean, sharpen, oil, dry drawer |
If something we sold you arrives faulty or fails in a way this guide cannot fix, email support@teskis.com and we will sort it out. Our returns and refunds policy runs to thirty days, used or unused. More practical guides are collected in the notes.